Museum of Family History

In this activity, students learn about a part of their own family history and have the opportunity to practice interviewing and writing skills. To showcase their learning, students curate their own museum of family history artifacts.

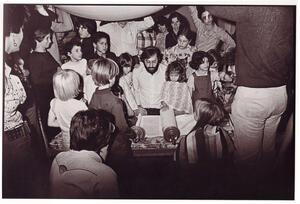
People gathered around an open Torah being read during Simchat Torah as others hold a tallit aloft over the children and Torah.

Courtesy of Bill Aron

Overview

Enduring Understandings

  • Artifacts are objects of historical and personal significance in Jewish life
  • Creating and recording history is something that can be done by all people, not only by scholars and writers

Essential Questions

  • What is oral history?
  • If you want to find out about someone’s life experiences, what questions should you ask them?

Materials Required

  • Dry erase/chalk board or butcher block paper
  • Writing implements (markers, chalk, pens, pencils)
  • Craft supplies (markers, crayons, glue, etc.)
  • Paper in assorted sizes and colors
  • Tape
  • Timeline and expectations for the project for students and families

Notes to Teacher

The lessons included in the My Bat Mitzvah Story curriculum are intended to take much longer than an average class period, and they offer many options for extended projects. Please feel free to pick and choose what will be most practical and useful for your own classroom, and do not feel obligated to complete the lessons in full.

These lessons are intended for b’nai mitzvah students and draw on the Bat Mitzvah experience in particular. While they can certainly be completed in all-girl classrooms, teachers are encouraged to use these lessons in multi-gender classrooms as well. While the lessons are rooted in the Bat Mitzvah experience, the themes are applicable to all students in this age group.

This lesson includes many extension activities that can be used engage your students in substantive, long-term projects, such as:

Audience Participation

In step # 5 below (Closing Discussion), invite all of the visitors to participate in the discussion. Alternately, you could have your students form a panel and have the visitors/audience members ask them questions.

Telling Stories Through Art

Depending on the age of your students and the time you have to devote to this project, you may also consider using the interviews and artifact photos students collect to inspire art projects based on the narrator’s stories. For one example of how this has been done, check out the “adDRESSING Women’s Lives” project by Barabara Rosenblit, Sheila Miller, and students at the Weber School in Atlanta, GA.

Multimedia Museum

Using a video or slideshow tool, teachers can create a multimedia presentation for their class oral history project, using video, audio, and images. After completing Parts 1 and 2 below, find a presentation tool that meets your needs. You may choose to use PowerPoint, or there are several free tools online, like PreZentit, Empressr, or Zoho Show. Students gather digital photographs of the objects their narrators are talking about that you then upload them into the slide show.

You can also include audio or video clips. Instead of writing responses to some of the prompts in Parts 3 and 4 above, you may choose to have your students talk about the experience of doing oral history on video and include the clips in your presentation.

Students can also write the “story version” of their oral history (See Part 3, #4) and do an audio recording of themselves reading it to serve as the “voice over” for the photograph or image they include in the slide show.

Note: Be sure to notify parents and families of your plan to put things on the web. Many schools have privacy policies and rules about posting to school websites or class blogs. If you or your school needs more guidance about this issue, consider contacting Darim Online, or reading their Social Media Policy Workbook to make sure you are protecting your students and their work.

Lesson plan

Where does history come from?

Open this section in a new tab to print

As educators, we often ask students to read a text and answer questions about what the words can tell us about an event or period in the past. Similarly to texts, objects can also teach students about history and allow those who study them to learn about individual stories as well as the broader historical context from which the object is collected. Use this time capsule activity to introduce the importance of objects in history to your students.

To prepare for this activity:

  1. Label the board, or a large piece of paper hung on the wall, with “Our Time Capsule.”
  2. Make sure the room is set up with space for students to make art at desks or tables.

Activity Plan

  1. Have a student explain what a time capsule is. Make sure students understand that a time capsule is an example of physical things that hold meaning for people and that represent a specific period and place in time. Explain that you are going to make an example time capsule to capture the lives of students in your classroom as they are at this moment in time.
  2. Provide students with markers/crayons/etc. and a piece of paper. Each student should think for a minute about what objects they would include in a time capsule that would help the people who open it understand who they are.
  3. Give students 5-10 minutes to draw/write about their object on the small piece of paper.
  4. One-by-one, have students come up and attach their objects to the time capsule and briefly explain what they’ve contributed and why they’ve chosen that object.
    1. If you have a large number of students, you may want to allow them to share in small groups and attach the objects afterward.
  5. Explain that while some objects are organized in time capsules or museums, there are many objects that are important to history in our homes and communities.
    1. Have the students suggest what kinds of objects might be important to future generations. What kinds of objects would they like to see from the past? What interesting objects have they seen in museums or other places that made them curious about history? Are there objects in their families that tell their histories?
    2. If they would like, students can focus this discussion on Jewish ritual or cultural objects. What objects are special to Jews in general? What “Jewish” objects are important in their family or community?
  6. Introduce the Oral History project.
    1. This is a good point to introduce the project and to give students a timeline for the project as well as a letter to families explaining the scope of the project since students will most likely need support from parents or other family members in coordinating an interview.
    2. Explain to students that they will need to contact an older family member, friend, or community member whom they would like to interview. Students should ask the individual to share an object that is important or special to them as the focus of the interview. Make sure that students are prepared to borrow the object or take a photo of it to share at a later part of the project.
      1. You may choose to emphasize specific objects for your class to focus on, for instance Jewish ritual objects, the coming-of-age/b’nai mitzvah experience, items from childhood, holiday celebrations, old photographs, etc.
      2. Objects can take many forms. Some examples include:
        1. Ritual objects
        2. Toys
        3. Clothes
        4. Old letters/documents
        5. Photographs
        6. Jewelry

Becoming Oral Historians

Open this section in a new tab to print

This part of the activity will help you introduce the concept of oral history and help students see themselves as important players in the task of collecting history and historical artifacts. Students will learn how to formulate questions for their own oral history interviews and will be given time to write down their ideas.

To prepare for this activity:

Activity Plan

  1. This activity starts with a discussion so decide how you want your classroom to be set up. Will chairs/desks be in a circle? Will you have students sitting at tables?
  2. In order to help students form strong interview questions you may want to write some examples on the board or prepare a handout ahead of time. You can use the Oral History primer (link to PDF) as a basis for instruction.
  3. If you are going to demonstrate an example interview, you will need to write a script or at the very least have a few questions written out to ask. Think about if you will bring in someone from the community to interview in front of the class or if you will just have a student serve as the “narrator.”
    1. What is Oral History?
      1. Introduce the topic of oral history by asking some introductory questions and allowing students to respond:
        1. What is history?
        2. How do we know?
        3. Who writes history? Who should write history?
        4. Are there parts of history we don’t read about in books?
          1. How do we know about that kind of history?
        5. Do we have a responsibility to tell our own stories?
      2. Explain that conducting an oral history interview is like listening to a choose-your-own adventure story about someone else’s life. Every person you know has a unique story to tell, and you probably won’t ever get to hear it—unless you ask. Oral history lets you use questions to get the information you think is most interesting.
      3. Oral history also reminds us that famous people aren’t the only ones whose stories matter—every person is part of history. And when you interview someone whose story is not already well-known or documented in a public place (like in the newspaper), you are doing the important work of contributing to history.
      4. Prepare for the interviews
        1. Using the Family History Tool Kit’s guide for “How to Ask Great Questions,” (see “Teacher Resources” section below) demonstrate the different kinds of questions interviewers need to ask to get a good story. It will help to make a chart of open and closed ended questions and to write out some examples so everyone can see them.
        2. Conduct a short, sample oral history interview in class to demonstrate what questions to ask and what technique to use. You can also show a clip of an example oral history interview.
        3. Give each student a pencil and paper. Leaving the guide on the board, have each student come up with 5-10 questions they might ask the person about their object and the story behind it.
          1. Collect the papers, or walk around the room, and read them over to make sure the students have come up with questions that will help them get the information they need. Students can also share their questions in pairs and give one another feedback.
          2. Alternatively, you may choose to come up with a general list of questions as a group for students to use.
      5. As homework, students should take their questions home and interview their narrator, either over the phone, in person, or via email. Include a note for parents so that adults can assist with the project. Students should bring responses to the next class meeting. *This process may take several weeks, be sure to keep that in mind as you think about how to run this activity in your own classroom or congregation.
        1. Remind students that although an in-person interview is best, they may choose to do a computer interview (using Skype or similar video conferencing software), a phone interview, or send the person questions over email.
        2. Encourage students to record their answers whether they are written down or taped using a video or audio recorder. For more resources on this, consult the Oral History primer.

Planning the Exhibits

Open this section in a new tab to print

Now that students have learned about oral history and begun the interview process, your class can begin to think about how they will share what they have learned with each other, and if you choose, with the larger community. This section will guide students through the process of organizing and sharing their findings as oral historians and curators.

To prepare for this activity

  1. Students should have completed (or be in the process of completing) an oral history interview with an older family member, friend, or community member about a significant object of the individual’s choosing.
  2. Students should bring the responses to their questions to class.
    1. If a student or students have not completed their oral history interviews yet, you can begin this part of the activity as long as they know which objects they will be asking about and if they have some background on why the object is important.

Activity Plan

  1. In pairs or small groups, have students share their interviews and objects with each other. Hand out the following prompts to each group, or post them on the board for students to use as a guide.
    1. Who did you choose to interview? Why?
    2. What object did your narrator choose to share?
    3. What is the most interesting thing you learned in your interview? What is your favorite part of your narrator’s story?
    4. Why is your narrator’s story important to you? To the Jewish community? To the world?
  2. Come together as a whole class and decide how to group the objects students have gathered. Will you group them by time period? By type of object? Each group will make up one “exhibit” in the museum.
  3. Help the students decide who belongs in each “exhibit” or object group.
    1. Each group should write 3-5 sentences about why these kinds of objects are important and what they can teach us about the past.
    2. The members in each group should also discuss what they will name their exhibit and create a poster with the exhibit title and the description they’ve written.
  4. As homework (or in class, as time allows), ask students to write a “story” version of their interview, using what they learned from their narrator. This will serve as the “label” of their piece in the museum.
    1. Offer students the opportunity to write some of their reflections on the process with the following questions:
      1. Why is your narrator’s story an important part of your own story or your community’s story?
        1. What similarities and differences are there between your life and your narrator’s life?
        2. How does your narrator’s story influence your life?
      2. Did doing this project make you curious about other parts of history? How? What parts?
      3. What part of this project was meaningful to you? What did you like best about doing the oral history project?
      4. Is collecting family/oral history important? Why or why not?
      5. How does your narrator’s story relate to your bar/bat mitzvah?

Curate and Assemble the Museum

Open this section in a new tab to print

This is the last step in the family history museum process. Now that students have learned about oral history and conducted their own interviews, they will set up a physical museum in order to showcase their learning with each other and the community. Be as creative as time will allow you in this step. This is a great opportunity to bring the community together and for students to connect what they are doing in class to their lives.

To prepare for this activity:

  1. Think ahead about who to invite to your class’ &ldqou;museum.” Contact members of your community and allow them time to reserve the date of the exhibition.
  2. Students will need to have prepared a report of what they learned in their interview and their own reflections on the stories they heard.

Activity Plan

  1. Begin by having students share about the process of doing oral history.
    1. What was the hardest thing about this project? Why?
    2. What was the most interesting or exciting thing about this project? Why?
  2. Have students brainstorm and decide on a name for their museum.
    1. Some students may want to make a sign to hang on the door of the classroom as a welcome to the museum.
    2. Meanwhile, other students can write a brief description of what the museum is, what visitors will find in the museum, and how the students made the museum.
  3. After you’ve decided on a name, have the students split into their exhibit groups and curate their exhibits around the classroom. You can do this on desks, hanging pictures and written pieces on the walls, or by having each group assemble its materials on a piece of butcher paper.
    1. Students should include the exhibit title and description from the previous class session as they arrange all of the objects and descriptions.
    2. Be sure that each student’s individual writing and object are included in the exhibit.
  4. If you have invited others to attend your museum, you are now ready to open for business!
    1. Allow the students to go around and view all of the objects in the museum.
    2. Encourage students and visitors to ask questions about the exhibits.
  5. Closing Discussion (For more ideas relating to this, see “Extending the Activity”)
    1. Have the students (or all of the visitors) assemble as a group. Discuss the following questions:
      1. Which is your favorite object? Why?
      2. Is there anything you saw that surprised you?
      3. If you were going to add your own object to the museum, what would you choose?
      4. Are these objects different from the artifacts we might see in other museums? Why or why not?
      5. Are these objects important? Why or why not? Who are they important for?
      6. Do you think the bar/bat mitzvah is an important time to learn about history? Why or why not?
      7. Do any of these objects feel relevant or important to you as you take the next step into your adult Jewish life? If so, which one(s)?

    Make sure you take pictures of your museum and share them with students, families, your congregation, and the Jewish Women’s Archive!

Teacher resources

Family History Toolkit

0 Comments

Plain text

  • No HTML tags allowed.
  • Web page addresses and email addresses turn into links automatically.
  • Lines and paragraphs break automatically.

Donate

Help us elevate the voices of Jewish women.

donate now

Listen to Our Podcast

Get JWA in your inbox

Read the latest from JWA from your inbox.

sign up now

How to cite this page

Jewish Women's Archive. "Museum of Family History." (Viewed on November 21, 2024) <https://jwa.org/teach/mbms/museum-of-family-history>.